Building Multi-Tenant SaaS with Laravel: Complete Guide
Learn how to architect a production-ready multi-tenant SaaS application using Laravel with database isolation, role-based permissions, and Stripe billing.
What is Multi-Tenancy?
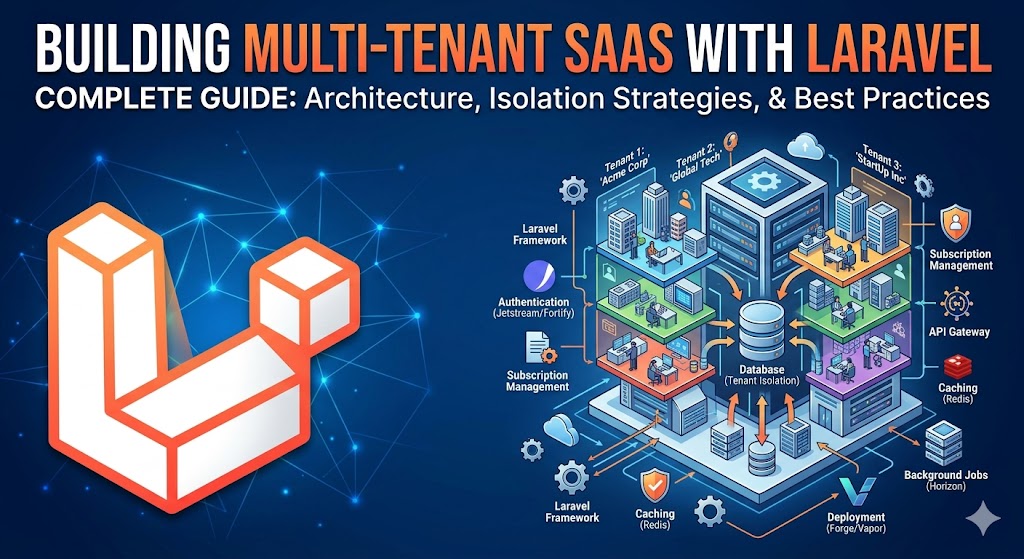
Multi-tenancy is an architecture where a single application instance serves multiple customers — called tenants — while keeping their data completely isolated from one another. It is the backbone of every successful SaaS product, from Slack to Shopify to Notion.
The key distinction from a traditional multi-user app is isolation. In a standard app, all users share the same data space and permissions control what they can see. In a multi-tenant SaaS, each customer's data exists in its own logical or physical silo. One tenant can never accidentally read, write, or corrupt another tenant's records — even if there is a bug in your application code.
I have migrated three production SaaS platforms to multi-tenant architecture over the past four years. In one case, a B2B startup's single-tenant Laravel app was collapsing under 3,000 users — one slow tenant degraded performance for everyone. After migration to a multi-tenant model with database-level isolation, the platform now serves 15,000+ tenants with consistent sub-200ms response times.
Choosing Your Multi-Tenancy Strategy
There are three main approaches to multi-tenancy in Laravel. Each has genuine trade-offs in complexity, performance, cost, and compliance posture.
Strategy 1: Single Database with tenant_id Column
Every table gets a tenant_id foreign key. All tenant data lives in the same tables, separated by this column. Eloquent global scopes automatically filter every query to the current tenant.
Pros: Simple to implement, cheapest to run, easy to query across tenants for analytics, straightforward schema migrations.
Cons: A missing global scope is a catastrophic data leak. Cannot satisfy strict data residency requirements (GDPR Article 25, HIPAA). Noisy neighbour risk — one tenant's heavy queries affect everyone. Backup and restore is all-or-nothing.
Best for: Early-stage startups, internal tools, B2C apps where data residency compliance is not a concern.
Strategy 2: Separate Schemas Per Tenant (PostgreSQL)
Each tenant gets their own PostgreSQL schema (a namespace within the database). The application switches the search_path to the tenant's schema at the start of each request. Tables are identical across schemas — only the data differs.
Pros: Strong data isolation at the database level, easier per-tenant backup and restore, can satisfy many compliance requirements, no risk of cross-tenant data leaks from missing scopes.
Cons: Schema migrations must run for every tenant (manageable with a custom Artisan command), PostgreSQL-specific (cannot use MySQL), slightly higher operational complexity.
Best for: Mid-market B2B SaaS with compliance requirements, teams already on PostgreSQL.
Strategy 3: Separate Databases Per Tenant
Each tenant gets a completely separate database, with its own credentials, migrations, and backups. The application resolves the correct database connection at the start of each request.
Pros: Maximum isolation — impossible for one tenant to affect another at the database level. Per-tenant backup, restore, and scaling. Satisfies the strictest data residency and compliance requirements. Can place tenant databases in different regions.
Cons: Highest operational cost and complexity. Running 1,000 tenants means managing 1,000 databases. Cross-tenant analytics require data federation. Schema migrations must be orchestrated across all databases. Onboarding a new tenant involves provisioning infrastructure.
Best for: Enterprise B2B SaaS, regulated industries (healthcare, finance, legal), any product where tenants have contractual data isolation requirements.
Step-by-Step Implementation with Laravel
I will walk through the single-database approach with tenant_id — the most common starting point — and then show how to layer in Eloquent global scopes for automatic isolation.
Step 1: Create the Tenants Table
Start with a clean tenant model and migration:
php artisan make:model Tenant -m// database/migrations/xxxx_create_tenants_table.php
Schema::create('tenants', function (Blueprint $table) {
$table->id();
$table->string('name');
$table->string('slug')->unique(); // used for subdomain routing
$table->string('plan')->default('starter'); // starter, growth, enterprise
$table->string('stripe_customer_id')->nullable();
$table->string('stripe_subscription_id')->nullable();
$table->timestamp('trial_ends_at')->nullable();
$table->timestamp('subscription_ends_at')->nullable();
$table->timestamps();
});Every model that belongs to a tenant gets a tenant_id column:
$table->foreignId('tenant_id')->constrained()->cascadeOnDelete();Step 2: Resolve the Tenant from the Request
You need to identify which tenant is making the request on every hit. The two most common approaches are subdomain routing (acme.yourapp.com) and a path prefix (yourapp.com/acme/). I prefer subdomains — they are cleaner, support custom domains more easily, and look more professional.
// app/Http/Middleware/InitializeTenancy.php
class InitializeTenancy
{
    public function handle(Request $request, Closure $next): Response
    {
        $subdomain = explode('.', $request->getHost())[0];

        $tenant = Tenant::where('slug', $subdomain)->firstOrFail();

        // Store in a singleton so the whole request has access
        app()->instance('tenant', $tenant);

        // Optionally set on the request for convenience
        $request->merge(['tenant' => $tenant]);

        return $next($request);
    }
}
Register this middleware in your route groups that serve tenant traffic — not on your marketing site or admin panel.
Step 3: Enforce Isolation with Eloquent Global Scopes
Global scopes are the heart of the single-database approach. They automatically append a WHERE tenant_id = ? clause to every query on the model.
// app/Models/Concerns/BelongsToTenant.php
trait BelongsToTenant
{
    public static function bootBelongsToTenant(): void
    {
        static::addGlobalScope('tenant', function (Builder $query) {
            if (app()->has('tenant')) {
                $query->where(
                    (new static)->getTable() . '.tenant_id',
                    app('tenant')->id
                );
            }
        });

        static::creating(function ($model) {
            if (app()->has('tenant') && empty($model->tenant_id)) {
                $model->tenant_id = app('tenant')->id;
            }
        });
    }
}
Apply the trait to every tenant-scoped model:
class Project extends Model
{
    use BelongsToTenant;

    // ... rest of your model
}
Now Project::all() automatically returns only the current tenant's projects. Project::create([...]) automatically sets the correct tenant_id. No developer on your team can forget — the isolation is enforced at the framework level.
Step 4: Add Role-Based Access Control
Within each tenant, you need roles. A tenant's Admin should be able to manage their team. A Member should only see their own work. Install Spatie Laravel Permission:
composer require spatie/laravel-permissionThe key insight for multi-tenant RBAC is that roles must be scoped to the team. Spatie supports this via the teams feature in Laravel Permission v6+:
// config/permission.php
'teams' => true,
'team_foreign_key' => 'tenant_id',
Set the current team before checking permissions:
// In your InitializeTenancy middleware, after resolving the tenant:
setPermissionsTeamId($tenant->id);
Now $user->hasRole('admin') checks only within the current tenant. A user who is an Admin in Tenant A is just a Member in Tenant B — their roles do not bleed across boundaries.
Step 5: Stripe Billing with Laravel Cashier
Bill the tenant, not the individual user. Install Cashier and add the Billable trait to your Tenant model — not your User model:
composer require laravel/cashierclass Tenant extends Model
{
use Billable;
}Create a subscription on tenant onboarding:
$tenant->newSubscription('default', 'price_starter_monthly')
    ->trialDays(14)
    ->create($paymentMethod);
Gate features by plan in your middleware stack:
class EnforcePlanLimits
{
    public function handle(Request $request, Closure $next, string $feature): Response
    {
        $tenant = app('tenant');

        $limits = [
            'starter'    => ['users' => 5,  'projects' => 10],
            'growth'     => ['users' => 25, 'projects' => 100],
            'enterprise' => ['users' => PHP_INT_MAX, 'projects' => PHP_INT_MAX],
        ];

        if ($feature === 'users' && $tenant->users()->count() >= $limits[$tenant->plan]['users']) {
            return response()->json(['error' => 'User limit reached for your plan.'], 403);
        }

        return $next($request);
    }
}
Automated Tenant Onboarding
Manual onboarding kills SaaS growth. Every minute a new customer waits to access your product is churn risk. Before I implemented automated onboarding for one client, their process took 45 minutes per new tenant — manual Stripe setup, manual database seeding, a Slack message to the ops team. After automating it with a queued job, onboarding dropped to under 3 minutes with zero human involvement.
// app/Jobs/ProvisionTenant.php
class ProvisionTenant implements ShouldQueue
{
    public function __construct(private Tenant $tenant, private User $owner) {}

    public function handle(): void
    {
        DB::transaction(function () {
            // 1. Seed default roles for this tenant
            setPermissionsTeamId($this->tenant->id);
            Role::create(['name' => 'admin', 'guard_name' => 'web', 'team_id' => $this->tenant->id]);
            Role::create(['name' => 'member', 'guard_name' => 'web', 'team_id' => $this->tenant->id]);

            // 2. Assign the owner as admin
            $this->owner->assignRole('admin');

            // 3. Seed default workspace data
            $this->tenant->projects()->create([
                'name' => 'My First Project',
                'tenant_id' => $this->tenant->id,
            ]);

            // 4. Send welcome email
            Mail::to($this->owner)->send(new TenantWelcome($this->tenant));
        });
    }
}
Dispatch this job from your Stripe webhook handler when a customer.subscription.created event arrives — not at registration. You want to provision only paying (or trialing) customers, not anyone who hits the sign-up form.
Production Best Practices
Never Disable Global Scopes in Production
Eloquent lets you call ->withoutGlobalScope('tenant') to bypass tenant isolation. This is useful in admin commands and data migrations. But it is a loaded gun. Keep a code review checklist item: any use of withoutGlobalScope in application code (not console commands) requires a second pair of eyes.
Use Database Transactions for Tenant Provisioning
If tenant provisioning fails halfway through — the Stripe customer was created but the database seeding failed — you end up with a ghost tenant. Wrap all provisioning steps in a single transaction. If anything throws, roll back everything and alert the team.
Separate Your Admin Panel from Tenant Routes
Your internal admin panel (where you manage all tenants) must run on a different subdomain (admin.yourapp.com) with a separate middleware stack that does not apply tenant isolation. Never route your superadmin through the tenant middleware — you will lock yourself out.
Test Tenant Isolation Explicitly
Write a test that creates two tenants, creates data under Tenant A, then asserts that Tenant B cannot see it:
public function test_tenant_cannot_see_other_tenant_data(): void
{
    $tenantA = Tenant::factory()->create();
    $tenantB = Tenant::factory()->create();

    app()->instance('tenant', $tenantA);
    setPermissionsTeamId($tenantA->id);
    $project = Project::factory()->create(['tenant_id' => $tenantA->id]);

    app()->instance('tenant', $tenantB);
    setPermissionsTeamId($tenantB->id);

    $this->assertCount(0, Project::all());
    $this->assertNull(Project::find($project->id));
}
This test should be part of your CI pipeline and run on every pull request. A failing tenant isolation test is a severity-1 incident.
Common Mistakes to Avoid
Mistake 1: Applying Global Scopes Too Late
If your global scope references app('tenant') but the tenant has not been resolved yet (e.g., in a queued job), the scope silently applies no filter and returns all tenants' data. Always set the tenant context explicitly at the start of every queue job that touches tenant data.
Mistake 2: Forgetting to Scope Queued Jobs
Queued jobs run outside the HTTP request lifecycle. Your InitializeTenancy middleware does not run. You must manually set the tenant context in every job's handle() method:
public function handle(): void
{
    app()->instance('tenant', $this->tenant);
    setPermissionsTeamId($this->tenant->id);

    // Now Eloquent scopes work correctly
}
Mistake 3: Sending Cross-Tenant Emails
If you queue an email notification without capturing the tenant in the job payload, the job may execute under a different tenant context and send the email with the wrong branding, domain, or from address. Always inject the tenant model into every job constructor.
Mistake 4: Running Migrations Without a Tenant Context Check
If you add a column to a tenant-scoped model and forget to populate tenant_id in the migration's data backfill, you will null out existing records' tenant associations. Always include a whereNotNull('tenant_id') assertion in data migrations.
Frequently Asked Questions
How long does it take to build a multi-tenant SaaS with Laravel?
A production-ready multi-tenant Laravel SaaS — with subdomain routing, Stripe billing, role-based access, and automated onboarding — typically takes 8–16 weeks to build from scratch, depending on your feature scope. The multi-tenancy layer itself (middleware, global scopes, provisioning job) takes 1–2 weeks. The remaining time is your actual product features. If you have an existing single-tenant app and need to migrate it, expect 3–6 weeks depending on how many models need tenant isolation applied.
Should I use a package like Tenancy for Laravel or build my own?
The Tenancy for Laravel package (formerly Stancl/Tenancy) is excellent for the separate-database strategy. It handles database creation, migration orchestration, and bootstrapping automatically. For the single-database strategy, I recommend building your own global scope trait — it is 50 lines of code and gives you complete control without a heavy dependency. I have used both in production and reach for the package only when I need per-tenant databases.
How do you handle database migrations across thousands of tenants?
For the single-database strategy, standard php artisan migrate covers all tenants in a single run — no special handling needed. For separate schemas or separate databases, you need a custom Artisan command that iterates over all tenants and runs migrations for each. The Tenancy for Laravel package handles this automatically with php artisan tenants:migrate. For 1,000+ tenants, run migrations in a queued background job with progress tracking and failure alerting.
How do you handle custom domains for tenants?
Store the custom domain in your tenants table alongside the subdomain slug. In your InitializeTenancy middleware, resolve the tenant by custom domain first, falling back to subdomain. On the infrastructure side, you need a wildcard SSL certificate for your subdomain routing, and each tenant's custom domain needs a CNAME pointing to your load balancer. Services like Caddy make automatic SSL provisioning for custom domains straightforward.
Senior Full Stack Developer — Laravel, Vue.js, Nuxt.js & AI. Available for freelance projects.
Hire Me for Your Project